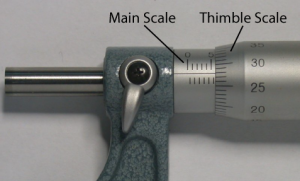
How to Read the Reading?
Reading = Reading of main scale + Reading of thimble scale.
Reading of main scale = 0 – 25 mm
Reading of thimble scale = 0 – 0.49mm
Example
 (This image is licensed under GDFL. The source file can be obtained from wikipedia.org.)
Reading of main scale = 5.5mm
Reading of thimble scale = 0.28mm
Actual Reading = 5.5mm + 0.28mm = 5.78mm
Youtube Video
Precaution Steps
- The spindle and anvil are cleaned with a tissue or cloth so that any dirt present will not be measured.
- The thimble must be tightened until the first click is heard.
- The zero error is recorded.
Interactive Animation
SHAW : micrometer (Java Applet)
External Link
The Micrometer – Upscale.Utoronto.ca